Difference between revisions of "Ubuntu Install ZoneMinder on Ubuntu Server"
| Line 501: | Line 501: | ||
===Secure Apache using mod_security and mod_evasive Modules=== | ===Secure Apache using mod_security and mod_evasive Modules=== | ||
'''Mod_security''' | '''Mod_security''' | ||
Acts as a firewall for web servers and applications, providing protection against brute force attacks. Install it and then restart Apache. | Acts as a firewall for web servers and applications, providing protection against brute force attacks. Install it and then restart Apache. | ||
Revision as of 06:15, 31 March 2020
LAMP (Linux, Apache, MySQL, PHP) vorbereiten
Installation Apache
sudo apt-get update
sudo apt-get upgrade
sudo apt-get dist-upgrade
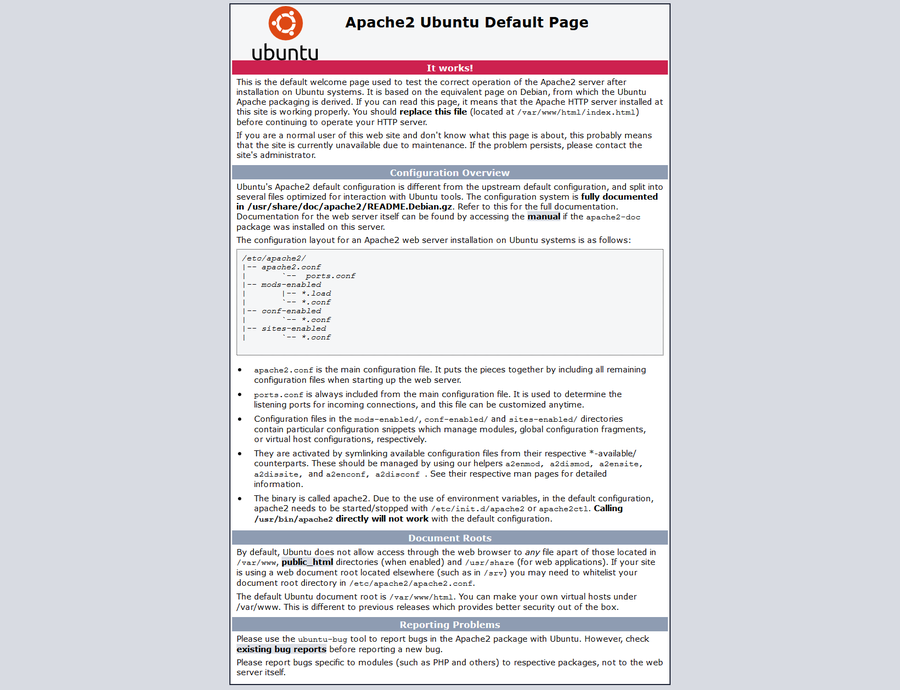
sudo apt-get install apache2
http://<hostname>/
Firewall einrichten
sudo ufw allow ssh
sudo ufw allow http
sudo ufw allow https
sudo ufw enable
sudo ufw status
Status: active

To                         Action      From
--                         ------      ----
22/tcp                     ALLOW       Anywhere
80/tcp                     ALLOW       Anywhere
443/tcp                    ALLOW       Anywhere
22/tcp (v6)                ALLOW       Anywhere (v6)
80/tcp (v6)                ALLOW       Anywhere (v6)
443/tcp (v6)               ALLOW       Anywhere (v6)
sudo ufw reload
MySQL installieren
sudo apt-get install mysql-server
sudo mysql
mysql> SHOW databases;
+--------------------+
| Database           |
+--------------------+
| information_schema |
| mysql              |
| performance_schema |
| sys                |
+--------------------+
4 rows in set (0.00 sec)
mysql> exit
Standardmäßig hat MySQL nur den Benutzer root. Mit diesem Benutzer kann man sich an der Datenbank anmelden, wenn man als root auf dem Linux Betriebssystem den Befehl mysql ausführt. Eine Passworteingabe ist nicht nötig.
Es ist empfehlenswert einen weiteren Benutzer anzulegen, der sich per Passwort verbinden kann. So kann beispielsweise über ein PHP Skript etc. auf die Datenbank zugegriffen werden. Der Benutzer kann folgendermaßen angelegt werden:
sudo mysql -e "CREATE USER 'mysqluser'@'localhost' IDENTIFIED BY 'mysqlpassword';"
sudo mysql -e "GRANT ALL PRIVILEGES ON * . * TO 'mysqluser'@'localhost' WITH GRANT OPTION;"
sudo mysql -e "FLUSH PRIVILEGES;"
mysql -u mysqluser -p
exit
Datenbank Adminbenutzer: mysqluser
Kennwort: mysqlpassword
PHP-FPM installieren
sudo apt-get install php-fpm

sudo a2enmod proxy_fcgi
sudo a2enconf php7.2-fpm

sudo systemctl restart apache2
sudo systemctl restart php7.2-fpm.service
Webserver Rechte anpassen
Die Webserver Dateien befinden sich Standardmäßig im Verzeichnis /var/www. Damit die PHP Erweiterung funktioniert, muss die Berechtigung angepasst werden. Der Benutzer sowie Gruppe des Verzeichnisses wird auf www-data geändert.
sudo chown -R www-data:www-data /var/www/
Danach setzen wir für das Verzeichnis das setgit Bit. Dadurch werden neu angelegte Dateien und Verzeichnisse automatisch der Gruppe www-data zugewiesen.
sudo find /var/www -type d -exec chmod g+s {} +
Benutzerzugriffe auf Webseiten-Dateien gewähren
Da wir auf das Verzeichnis /var/www ein setgit Bit gesetzt haben werden alle erstellten Dateien oder Verzeichnisse mit der Berechtigung www-data erstellt. Um nun auch mit einem normalen Benutzer Dateien und Verzeichnisse bearbeiten zu können, ohne die Berechtigung zu verändern wird bindfs benötigt.
sudo apt-get install bindfs
Wir erstellen uns im Homeverzeichnis einen Ordner über diesen wir auf das /var/www Verzeichnis zugreifen können.
mkdir ~/websites
Anschließend erstellen wir uns den passenden fstab Eintrag damit der Zugriff mit den passenden Berechtigungen durchgeführt wird.
Passt euch den folgenden Befehl an euren Benutzer an. In meinem Falls verwende ich den Benutzer myroot.
printf "\n\nbindfs#/var/www/ /home/$USER/websites/ fuse force-user=$USER,force-group=$USER,create-for-user=www-data,create-for-group=www-data,create-with-perms=0770,chgrp-ignore,chown-ignore,chmod-ignore 0 0" | sudo tee -a /etc/fstab
Überprüfen ob der Befehl richtig ausgeführt wurde:
sudo cat /etc/fstab
# /etc/fstab: static file system information.
#
# Use 'blkid' to print the universally unique identifier for a
# device; this may be used with UUID= as a more robust way to name devices
# that works even if disks are added and removed. See fstab(5).
#
# <file system> <mount point>   <type>  <options>       <dump>  <pass>
# / was on /dev/ubuntu-vg/ubuntu-lv during curtin installation
/dev/disk/by-id/dm-uuid-LVM-biSTbFwePFxtmgpVX68Rwa01ddBXHcAixzw1EBpYcV8kumDeCPxLkQnyNX2hkJ8M / ext4 defaults 0 0
# /boot was on /dev/sda2 during curtin installation
/dev/disk/by-uuid/c4c0f1b3-7284-4880-a2bc-11ab15c0a5f3 /boot ext4 defaults 0 0
/swap.img       none    swap    sw      0       0


bindfs#/var/www/ /home/myroot/websites/ fuse force-user=myroot,force-group=myroot,create-for-user=www-data,create-for-group=www-data,create-with-perms=0770,chgrp-ignore,chown-ignore,chmod-ignore 0 0
Anschließend das erstellte Verzeichnis aus dem Home-Folder mounten:
sudo mount /home/$USER/websites
PHP testen
PHP Testseite erstellen:
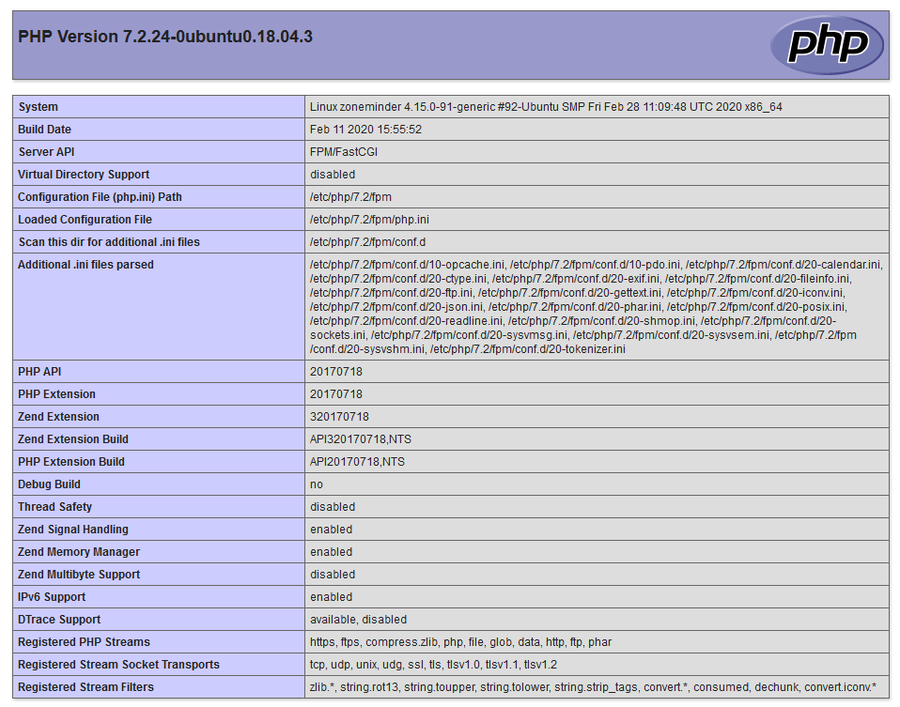
echo "<?php phpinfo();" > ~/websites/html/phpinfo.php
http://<hostname>/phpinfo.php
Installation ZoneMinder
ZoneMinder Repository hinzufügen
sudo add-apt-repository ppa:iconnor/zoneminder-1.34
sudo apt-get update
sudo apt-get upgrade
sudo apt-get dist-upgrade
Konfiguration MySQL
sudo rm /etc/mysql/my.cnf
sudo cp /etc/mysql/mysql.conf.d/mysqld.cnf /etc/mysql/my.cnf
sudo vi /etc/mysql/my.cnf
[mysqld]
#
# * Basic Settings
#
user            = mysql
pid-file        = /var/run/mysqld/mysqld.pid
socket          = /var/run/mysqld/mysqld.sock
port            = 3306
basedir         = /usr
datadir         = /var/lib/mysql
tmpdir          = /tmp
lc-messages-dir = /usr/share/mysql
skip-external-locking
sql_mode = NO_ENGINE_SUBSTITUTION
sudo systemctl restart mysql
ZoneMinder Installation
sudo apt-get install zoneminder
Webserver Konfiguration
sudo chmod 740 /etc/zm/zm.conf
sudo chown root:www-data /etc/zm/zm.conf
sudo chown -R www-data:www-data /usr/share/zoneminder/
sudo a2enmod cgi
sudo a2enmod rewrite
sudo a2enconf zoneminder
sudo a2enmod expires
sudo a2enmod headers
sudo vi /etc/php/7.2/fpm/php.ini
[Date]
; Defines the default timezone used by the date functions
; http://php.net/date.timezone
date.timezone = "Europe/Berlin"
sudo systemctl restart apache2
sudo systemctl restart php7.2-fpm.service
sudo systemctl enable zoneminder
sudo systemctl start zoneminder
Testen ob ZoneMinder funktioniert
http://<hostname>/zm
http://<hostname>/zm/api/host/getVersion.json
Konfiguration ZoneMinder
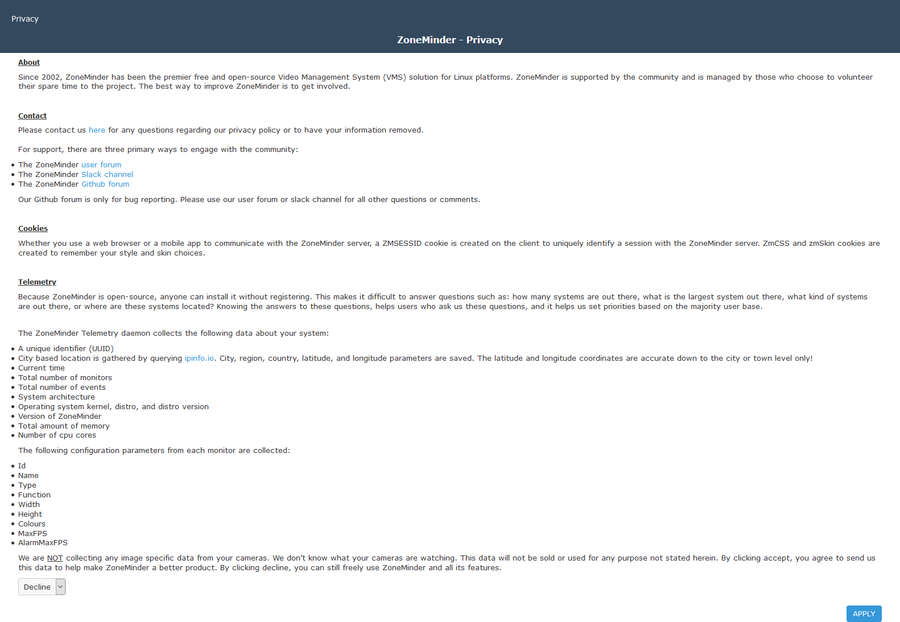
http://<hostname>/zm
Zeitzone ändern
- Options > System > TIMEZONE >
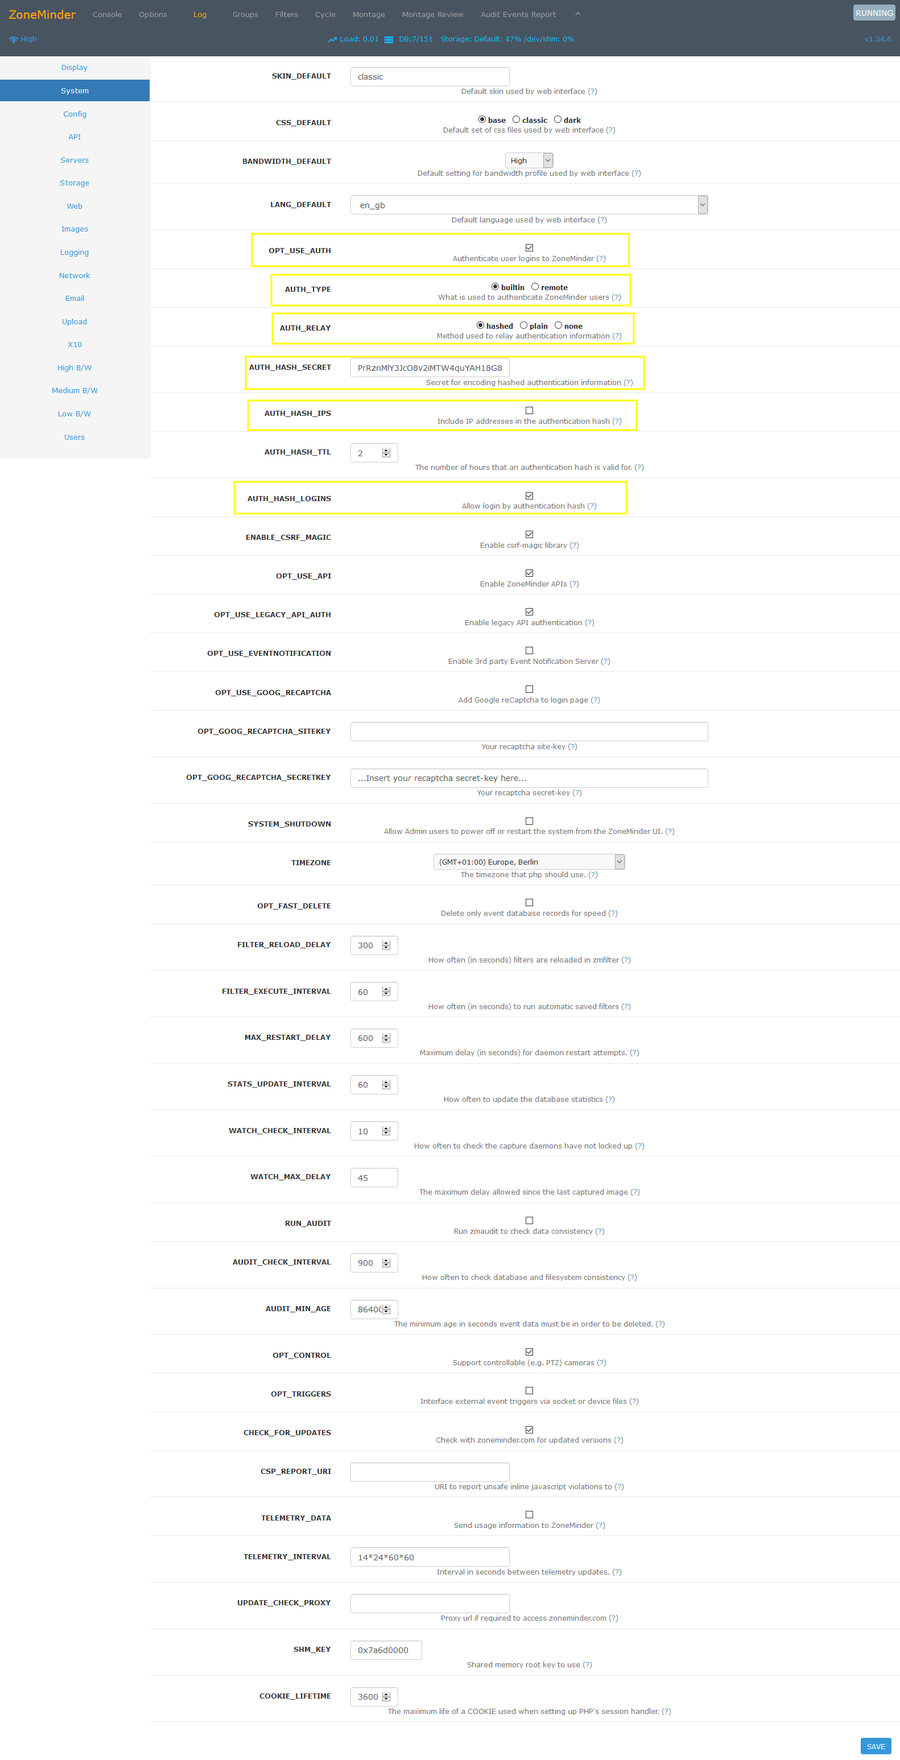
Authentifizierung aktivieren
- Options > System >
- Default Username: admin
- Default Password: admin
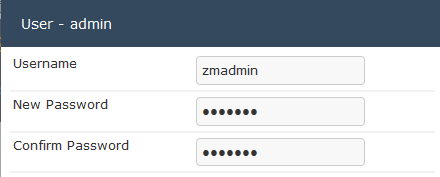
Benutzername und Kennwort ändern
- Options > Users> admin >
- Username: zmadmin
- Password: zmadmin
Datenbank Benutzer und Kennwort ändern
mysql -umysqladmin -p -e "grant lock tables,alter,drop,select,insert,update,delete,create,index,alter routine,create routine, trigger,execute on zm.* to 'zmdbuser'@localhost identified by 'zmdbuser';"
- ZoneMinder Datenbank Benutzername: zmdbuser
- ZoneMinder Datenbank Kennwort: zmdbuser
sudo vi /etc/zm/zm.conf
# ZoneMinder database user
ZM_DB_USER=zmdbuser

# ZoneMinder database password
ZM_DB_PASS=zmdbuser
sudo systemctl restart zoneminder
ZoneMinder NFS Storage
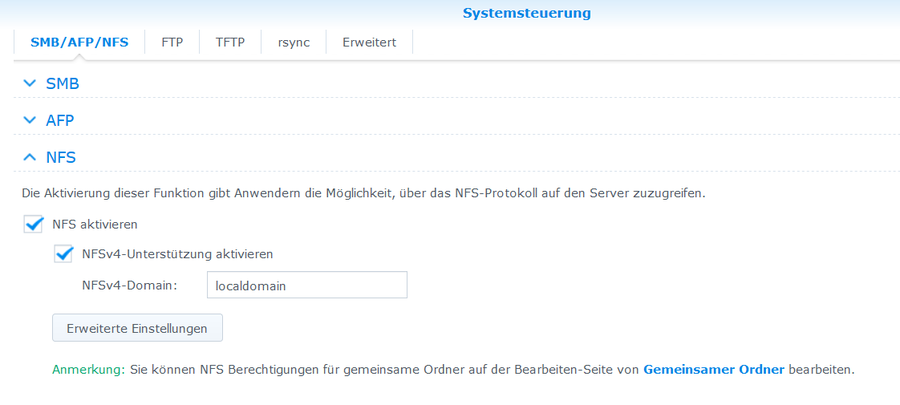
Damit ZoneMinder alle Daten auf einem NFS Share ablegen kann muss dies konfiguriert werden. In meinem Beispiel verwende ich eine Synology als NFS-Server sowie Datenspeicher.
NFS Freigabe erstellen
https://<hostname>:5001/
- Systemsteuerung > Dateidienste > NFS >
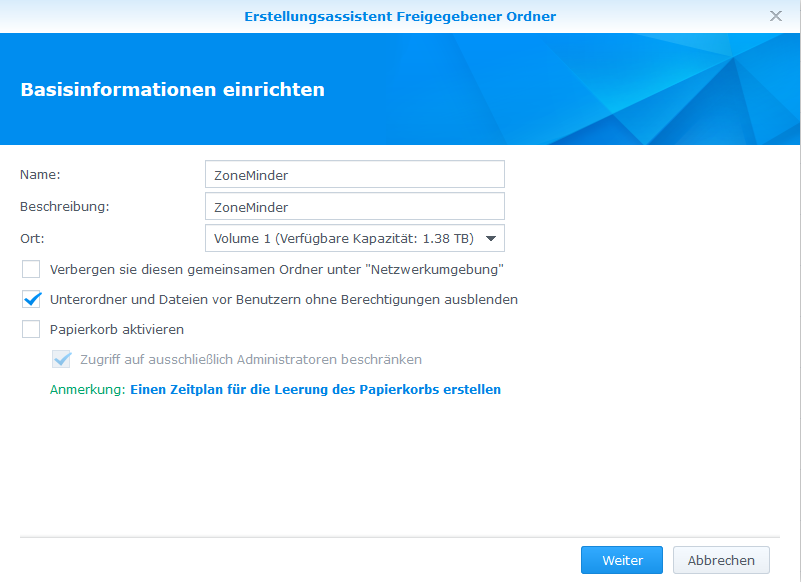
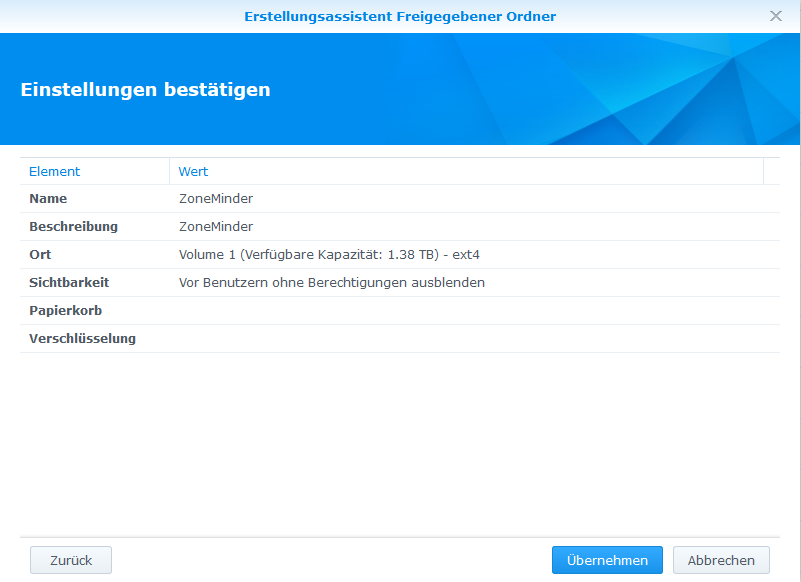
NFS Freigabe Verzeichnis erstellen
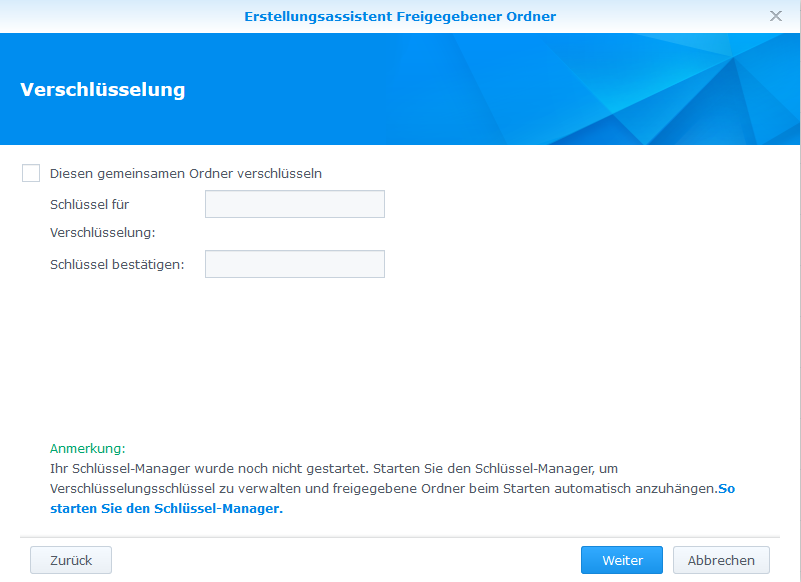
- Systemsteuerung > Gemeinsamer Ordner > Erstellen >
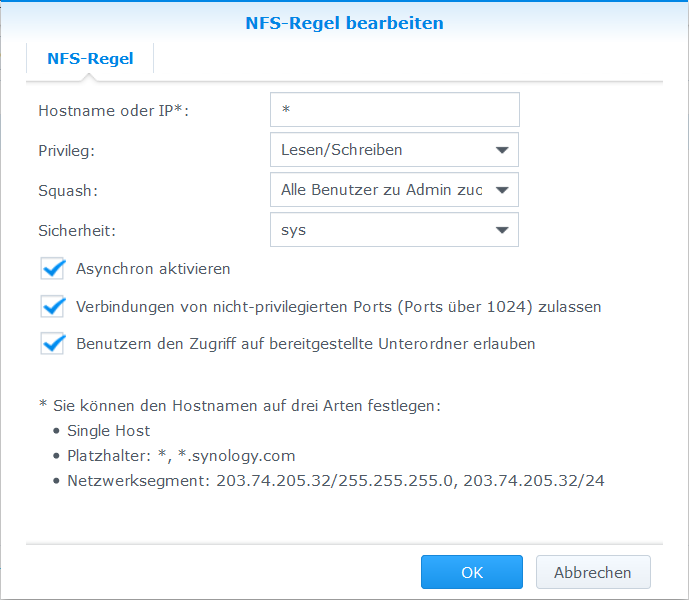
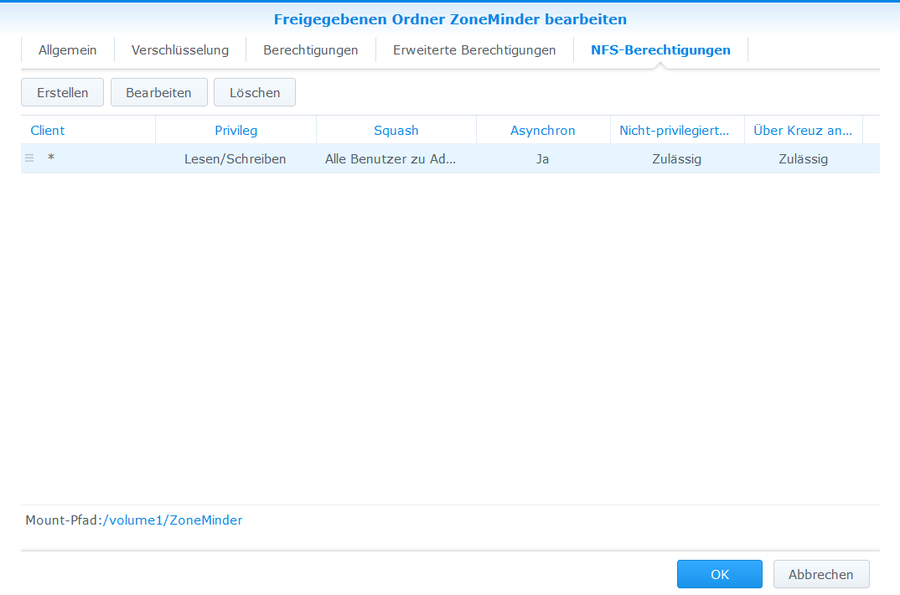
NFS Berechtigung setzen
- Systemsteuerung > Gemeinsame Ordner > ZoneMinder > Bearbeiten > NFS-Berechtigungen > Erstellen >
sudo service zoneminder stop
NFS Client installieren und konfigurieren
sudo apt-get install nfs-client nfs-common
sudo modprobe nfs
sudo su -
echo NFS | tee -a /etc/modules
exit
sudo cat /etc/modules
# /etc/modules: kernel modules to load at boot time.
#
# This file contains the names of kernel modules that should be loaded
# at boot time, one per line. Lines beginning with "#" are ignored.

NFS
sudo cp /etc/idmapd.conf /etc/idmapd.conf_orig
sudo vi /etc/idmapd.conf
[General]

Verbosity = 0
Pipefs-Directory = /run/rpc_pipefs
# set your own domain here, if it differs from FQDN minus hostname
Domain = localdomain

[Mapping]

Nobody-User = nobody
Nobody-Group = nogroup
ZoneMinder event storage
sudo vi /etc/systemd/system/var-cache-zoneminder-events.mount
# systemd NFS mount for ZoneMinder event storage

[Unit]
Description=NFS mount for ZoneMinder event storage
After=network.target
Before=zoneminder

[Mount]
What=192.168.1.5:/volume1/ZoneMinder
Where=/var/cache/zoneminder/events
Type=nfs

[Install]
WantedBy=multi-user.target
sudo systemctl enable var-cache-zoneminder-events.mount
sudo systemctl start var-cache-zoneminder-events.mount
sudo systemctl status var-cache-zoneminder-events.mount
ZoneMinder cache storage
sudo vi /etc/systemd/system/var-cache-zoneminder-cache.mount
# systemd NFS mount for ZoneMinder cache storage

[Unit]
Description=NFS mount for ZoneMinder cache storage
After=network.target
Before=zoneminder

[Mount]
What=192.168.1.5:/volume1/ZoneMinder
Where=/var/cache/zoneminder/cache
Type=nfs

[Install]
WantedBy=multi-user.target
sudo systemctl enable var-cache-zoneminder-cache.mount
sudo systemctl start var-cache-zoneminder-cache.mount
sudo systemctl status var-cache-zoneminder-cache.mount
ZoneMinder images storage
sudo vi /etc/systemd/system/var-cache-zoneminder-images.mount
# systemd NFS mount for ZoneMinder images storage

[Unit]
Description=NFS mount for ZoneMinder images storage
After=network.target
Before=zoneminder

[Mount]
What=192.168.1.5:/volume1/ZoneMinder
Where=/var/cache/zoneminder/images
Type=nfs

[Install]
WantedBy=multi-user.target
sudo systemctl enable var-cache-zoneminder-images.mount
sudo systemctl start var-cache-zoneminder-images.mount
sudo systemctl status var-cache-zoneminder-images.mount
ZoneMinder temp storage
sudo vi /etc/systemd/system/var-cache-zoneminder-temp.mount
# systemd NFS mount for ZoneMinder temp storage

[Unit]
Description=NFS mount for ZoneMinder temp storage
After=network.target
Before=zoneminder

[Mount]
What=192.168.1.5:/volume1/ZoneMinder
Where=/var/cache/zoneminder/temp
Type=nfs

[Install]
WantedBy=multi-user.target
sudo systemctl enable var-cache-zoneminder-temp.mount
sudo systemctl start var-cache-zoneminder-temp.mount
sudo systemctl status var-cache-zoneminder-temp.mount
sudo init 6
Webserver Konfiguration SSL only
SSL Konfiguration
Benötigte Pakete installieren
sudo a2enmod ssl
sudo systemctl restart apache2
Self-Signed Zertifikat erstellen
sudo openssl req -x509 -nodes -days 3650 -newkey rsa:4096 -keyout /etc/ssl/private/zoneminder-selfsigned.key -out /etc/ssl/certs/zoneminder-selfsigned.crt
Country Name (2 letter code) [AU]:DE
State or Province Name (full name) [Some-State]:Hessen
Locality Name (eg, city) []:Frankfurt
Organization Name (eg, company) [Internet Widgits Pty Ltd]:
Organizational Unit Name (eg, section) []:
Common Name (e.g. server FQDN or YOUR name) []:zoneminder.home.lan
Email Address []:
sudo chown root:ssl-cert /etc/ssl/private/zoneminder-selfsigned.key
sudo chmod 640 /etc/ssl/private/zoneminder-selfsigned.key
Virtual Host (Port 443) erstellen
sudo a2dissite default-ssl
sudo mv /etc/apache2/sites-available/default-ssl.conf /etc/apache2/sites-available/default-ssl.conf_orig
sudo vi /etc/apache2/sites-available/zoneminder-ssl.conf
<IfModule mod_ssl.c>
        <VirtualHost _default_:443>
                ServerName zoneminder.home.lan

                RewriteEngine on
                RewriteRule ^/$ https://zoneminder.home.lan/zm/$1 [L,R]

                ErrorLog ${APACHE_LOG_DIR}/zoneminder-error.log
                CustomLog ${APACHE_LOG_DIR}/zoneminder-access.log combined

                SSLEngine on
                SSLCertificateFile      /etc/ssl/certs/zoneminder-selfsigned.crt
                SSLCertificateKeyFile /etc/ssl/private/zoneminder-selfsigned.key

                <FilesMatch "\.(cgi|shtml|phtml|php)$">
                                SSLOptions +StdEnvVars
                </FilesMatch>
                <Directory /usr/lib/cgi-bin>
                                SSLOptions +StdEnvVars
                </Directory>

        </VirtualHost>
</IfModule>

# vim: syntax=apache ts=4 sw=4 sts=4 sr noet
sudo a2ensite zoneminder-ssl
sudo systemctl restart apache2
Standard Virtual Host (Port 80) deaktivieren
sudo a2dissite 000-default
sudo mv /etc/apache2/sites-available/000-default.conf /etc/apache2/sites-available/000-default.conf_orig
sudo vi /etc/apache2/ports.conf
# If you just change the port or add more ports here, you will likely also
# have to change the VirtualHost statement in
# /etc/apache2/sites-enabled/000-default.conf

#Listen 80

<IfModule ssl_module>
        Listen 443
</IfModule>

<IfModule mod_gnutls.c>
        Listen 443
</IfModule>
sudo systemctl restart apache2
Firewall Port 80 entfernen
sudo ufw delete allow http
sudo ufw status
sudo ufw reload
Hardening Webserver
Hide Apache Version and Operating System
sudo vi /etc/apache2/conf-enabled/security.conf
ServerTokens Prod
ServerSignature Off
sudo systemctl restart apache2
Disable Directory Listing and FollowSymLinks
sudo vi /etc/apache2/apache2.conf
<Directory /var/www/>
        Options -Indexes -FollowSymLinks
        AllowOverride None
        Require all granted
</Directory>
sudo systemctl restart apache2
Secure Apache using mod_security and mod_evasive Modules
Mod_security
Acts as a firewall for web servers and applications, providing protection against brute force attacks. Install it and then restart Apache.
sudo apt-get install libapache2-mod-security2 -y
sudo systemctl restart apache2
